Our border collies can be inclined to be a little fearful of novelty, sometimes anxious about unfamiliar people as well, and, as a breed, they don’t always enjoy being handled. So having to go to the vets where they may encounter novelty, handling and strangers in a small enclosed environment can be extremely stressful for border collies, and can result in some becoming very fearful of the vet and the vet practise. Cooperative care for border collies is a way of helping to prevent such issues as well as helping those that have already developed anxiety at the vet learn to overcome their fear. It can also ensure that collies are able to cope with handling carried out by carers, such as grooming, removing ticks, putting in ear drops etc.
To give an idea of timescale, a young dog with no vet fear or anxiety about handling could whiz through these exercises in a few weeks, but a dog that is already very fearful of any handling could take several years before they are able to tolerate any routine care such as injections or examinations. It’s important to work through the stages at your dog’s pace, looking out for any signs that he is worried and not pressing ahead any quicker than they are ready. A dog that won’t tolerate vet handling and is very phobic, can be a real problem, making yearly vaccinations or examination after an injury impossible without heavy sedation, so it’s an important concept to teach.
The reason that this training helps is because it gives your dog choice. They learn that they can stop anything happening just by getting up and getting off the mat. This choice allows them to cope with things they are worried about because they know that if it gets too much, they can quickly move away. Most assistance dogs are taught to cope with vet handling using cooperative care and even animals in zoos can be taught to have blood taken, or injections using cooperative care training.
What you’ll need to teach cooperative care for border collies
• a nice comfy, padded dog mat/pad that isn’t left down when not training
• treats
How to teach:
Stage 1
Be ready with your treats.
Lay down the mat. As soon as your dog looks at, or interacts with, the mat in any way, use his marker word and throw a treat away behind the mat so that he moves away from you and the mat then has to return over the mat to get back to you.
As soon as he goes near or steps on the mat on his way back, use his marker word and throw the treat again.
Stage 2
Once it is obvious that the dog understands that by standing on the mat he earns a treat, start to feed him on the mat instead of throwing the treat behind him. Feed him as often as in necessary to keep him on the mat to start with.
If he happens to sit or lie down, give him lots of praise and increase the feeding rate temporarily. If he doesn’t lie down, ask him or lie down or lure him into the down and praise him, then keep feeding every few seconds so that he learns to settle on the mat.
VERY IMPORTANT – THIS IS NOT A STAY EXERCISE. We are aiming to teach the dog that he can stay on the mat and earn treats or he can get up and walk away, but he won’t get treats. There must be NO PUNISHMENT of any kind during this training. Not even a frustrated sigh!
It should be clear to the dog that this is not a stay exercise. He must not be told off for getting off the mat, or not lying down. Instead, if he moves off the mat, don’t say anything, just pick it up and put it away until next time. When you next train him, feed him more frequently so that he stays on the mat.
Stage 3
Once your dog is lying down on the mat, start drip feeding him treats. Feed quite a lot to start with (a treat every couple of seconds) to ensure that he stays on the mat, then gradually state to decrease the frequency of the treats, from one every 2/3 seconds to one every five seconds, then ten and so on… The mat should be the best place for the dog to be and the only way that he will get treats in that situation.
Teaching in a narrow kitchen was helpful because he had to stand on the mat to get to me – it wasn’t easy to go round the side of it. He learned very quickly. Most dogs need a lot more sessions to get to the down.
Stage 4
Once your dog is happily lying on the mat and you’ve been able to increase the time between treat to roughly every ten second or more, then we can start to introduce showing him various items so that he gets used to us handling things around him. We will start with items he has no negative association with, such as spoons, cups, pens, anything really.
• Have the item ready behind your back.
• Feed him a treat for lying on the mat
• Bring the item out from behind your back for a few seconds so that he can see it.
• Put it behind your back again and treat.
• Repeat several times them throw a few treats away off the mat for him and pick it up and end the session.
Stage 5
Next we will do the same with items he may be a little more worried about such as:
• Brush or comb
• Muzzle
• Headcollar
• Lead etc
Once he is quite happy with being shown these things in this way,
move on to the next stage.
Stage 6
Over the next few sessions, start to move the items close to him, but still not touching him. Take things very slowly. Look for signs that he is anxious. If he is, go back to where he last felt safe. If he gets up and moves off the mat, that is a sign that he is really not happy. Pick the mat up and go back a few steps when you next train.
Stage 7
Once you can move the object almost up to your dog and he looks happy, you can start to very lightly touch the object on him in an area that you know he won’t mind. Reaching over his head is not a good idea, and he probably won’t like his paws being touched either. Safer areas are usually on a shoulder. The touch should be very brief, then immediately treat him.
If he flinches away, looks worried or gets up and walks off, go back to just moving the item next to him and then away again for a bit longer before trying again.
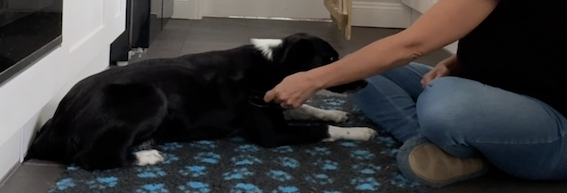
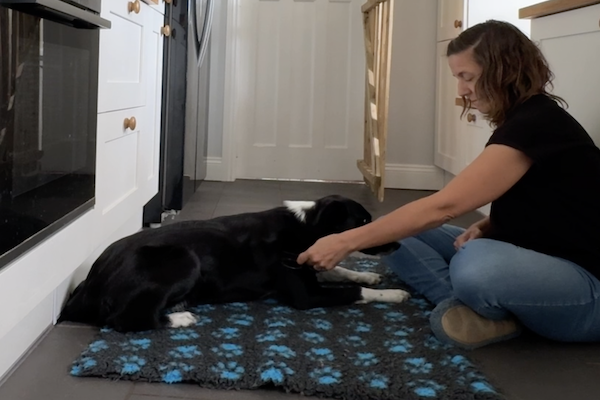
The following video shows Ozzy looking worried about being touched by the object, indicating that I should stop and go back to an earlier stage for longer. I would not usually repeat the touching if training in real life but for the purpose of the video, I continued so that people can see what a dog not coping looks like.
Stage 8
Over time, you should be able to gently increase the amount of time that the item is touching him for, and then gradually increase movement of the item on him as well. For instance, if they item is a brush, you can move it in a brush-type manner, then begin to gently actually brush him with it. If it’s a lead you can hold it against his collar, then move you other hand towards him as though you are going to clip it on. Take things at his pace, one step at a time. If you are trying to examine his ears, start by touching his ear briefly then immediately take your hand away. Once he is ok with that, try to lift a corner of his ear then take your hand away. Keep treating in between. Then lift a little more and so on….
In the following video I am resting an object on Flo and although she leans away slightly, wondering what I am doing, there is no sign of anxiety. I am able to gradually built up leaving the item on her for longer. Note: usually this would involve several training sessions, not just one.
In the next video I am showing how getting a dog used to ear touches might look. Again, this should be taken very slowly and achieved over several weeks or months for a very anxious dog. Flo is used to it so I was able to demonstrate what the progression might look like.

